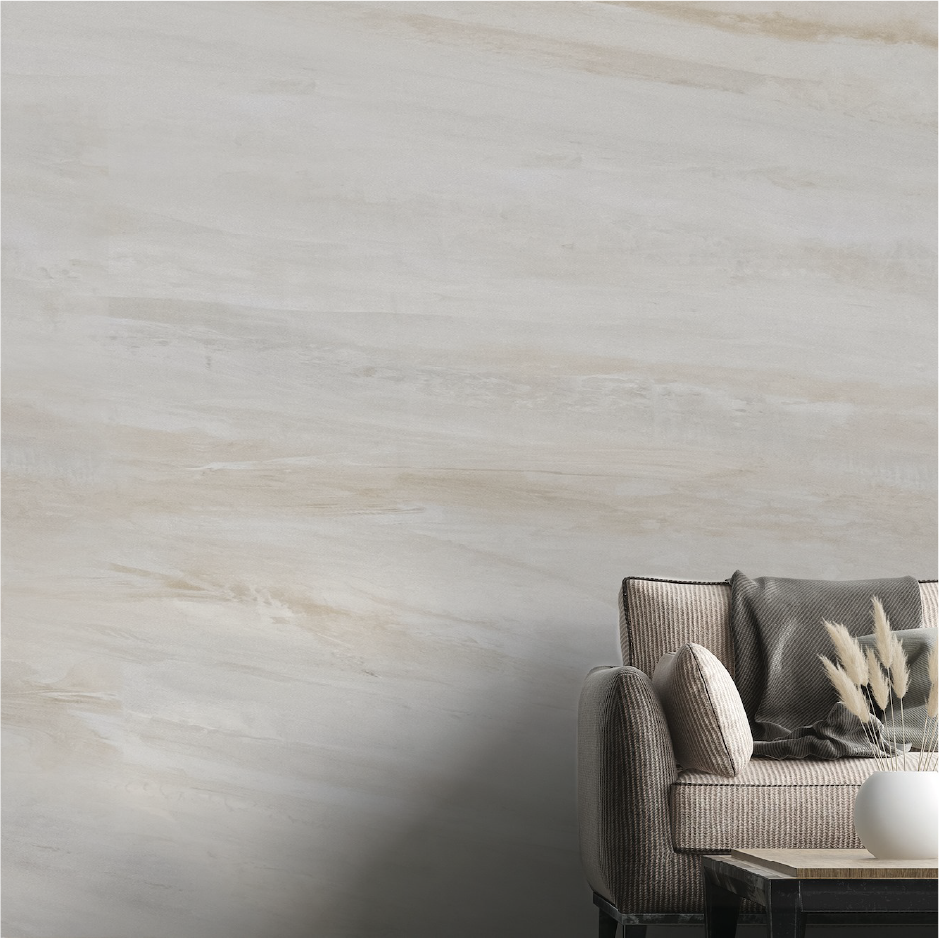


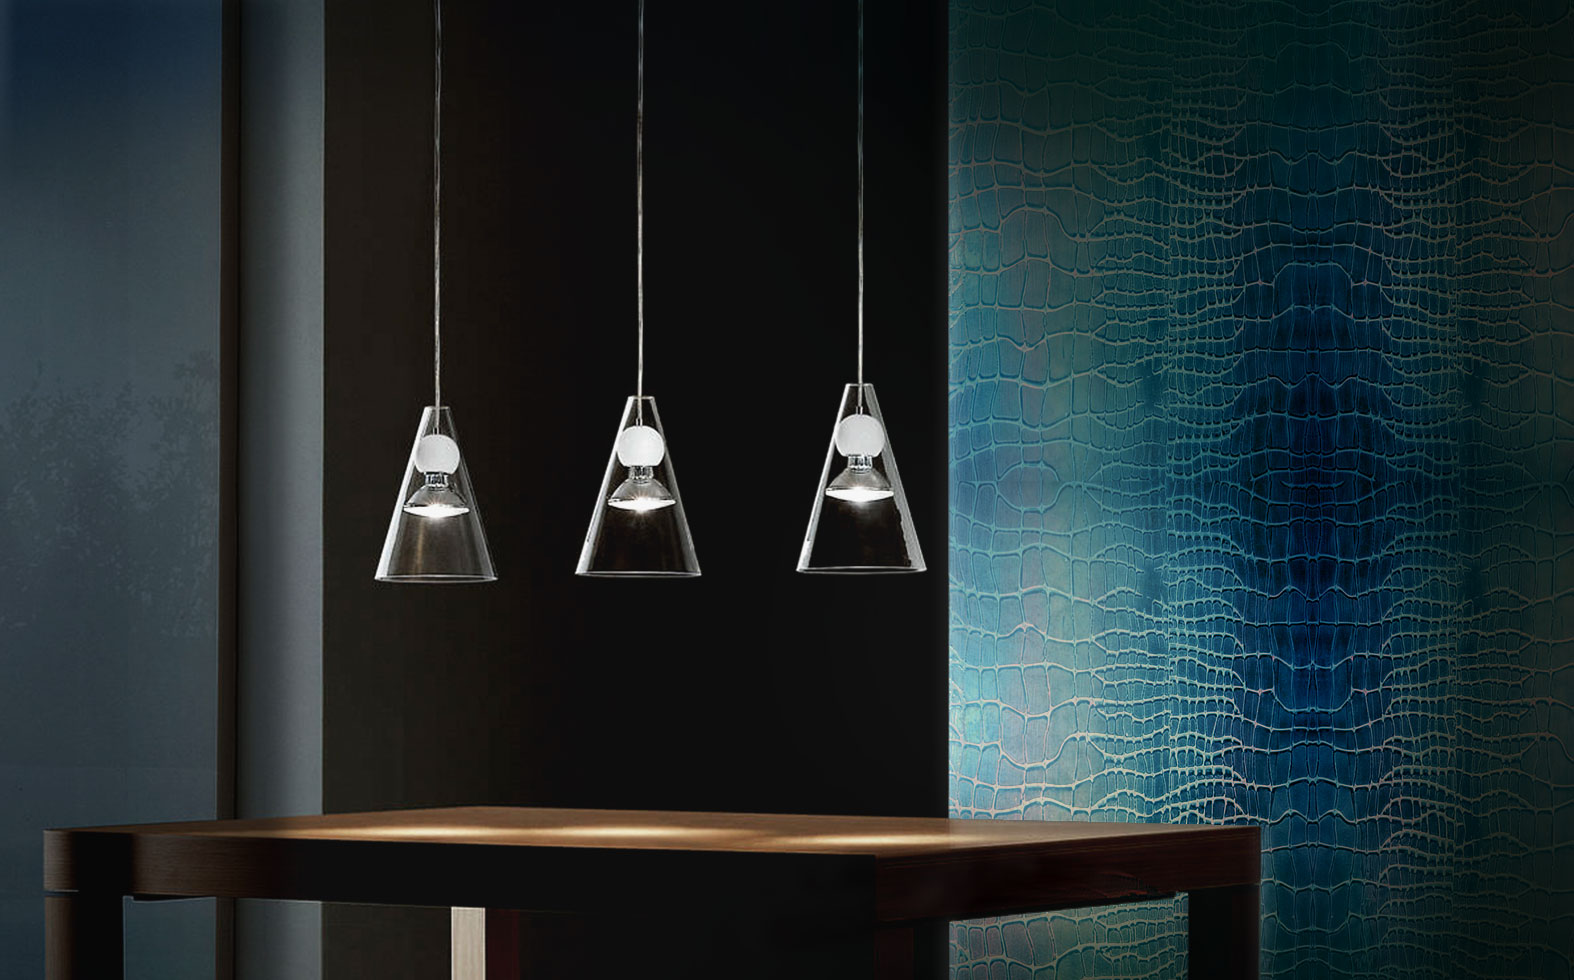


Loggia Plasma 3D
Plasma 3D is a moldable plastic decorative for interior, formulated with special synthetic resins, additives and inert charges that make it very resistant to straining. Plasma 3D is able to produce different effects depending on the working tools such as Viper, Crocodile, Marble, Granit as well as beautiful multitone effect.
Plasma 3D is recommended for indoors, to be applied on walls, furniture, doors of modern and antique buildings, shops, hotel, home and whenever its necessary to obtain elegance and originality at the same time.
Product Features: Gloss / Semi-Gloss / Durable
Ideal Temperature of Application: 20 to 35°C
Relative Humidity for Application: <= 50%
Dry Film Thickness: 0.5 to 1.5mm per coat
Touch Dry: 4-6 hours (at above temperature and humidity conditions)
Completely Dry: 48-72 hours
Density: 1.6-1.7kg/L
PH: 7-8
Solid Weight: 62%
Shelf Life: 2 years in original tightly closed containers away from direct sunlight and excessive heat
Min Storage Temperature: +5°C (41°F)
Max Storage Temperature: +30°C (86°F)
Base Coat (Optional)
Super P3D / Stucco P3D: 1m2/L
Fixative
Primer P3D Wall: 10m2/L
Primer
Universal Primer (For walls): 12m2/L
Intermedial P3D (For other surfaces): 14m2/L
Finish Coat
Plasma 3D: 5m2/L
Protective Coat (Optional)
Microvetro Bi: 5m2/L

Step 1 (Base Coat – Stucco P3D Wall) Optional Step
- Apply 1-2 layers using stainless steel trowel.
- In the presence of microcracks, insert Fiber Mesh on the first coat while its wet.
- Apply second coat after first coat is dry.
- Wait for 6-8 hours to dry.
- After dry, hand sand with 80/100 sanding paper, if necessary.
- Remove any residual dust.
Note: This step is only for uneven walls or walls not in good condition.
For walls with tiles please use Super P3D and follow floor system.
It is not necessary for good condition walls such as painted walls, or gypsum boards.
Step 2 (Fixative – Primer P3D Wall)
- Make sure floor is dust-free.
- Apply the primer using roller.
- Wait 1-2 hours to dry.
Step 3 (Primer – Universal or Intermedial P3D)
- Universal Primer is to be tinted the same colour as Plasma base.
- Universal Primer has two types: P/T is for light colours & D/A is for dark colours.
- Apply Universal Primer using roller.
- Wait 4-6 hours to dry.
Note: Use Universal Primer for walls. Use Intermedial Primer for Furniture, Table Top, Door and other surfaces.
Step 4 (Finishing Coat – BiPlasma 3D)
- Plasma 3D has two types: P/T is for light colours & D/A is for dark colours.
Different dilution with water is needed for different effect:
- Crocodile Effect: 5-10%
- Viper Effect: 10%
- Wood Effect: 20-25%
- Marmo Effect: 5%
- Granito Effect: 5-10%
- Cracle Effect: 0%
- Normal or Multitone Effect: 0%
For normal effect:
- Apply the first coat of Plasma 3D using stainless steel trowel, spreading the surface evenly.
- After 3-4 hours, apply the second coat and if necessary the third coat.
- After dry, burnish the wall with steel trowel.
- For high polished finish, sand the Plasma 3D with 3000 or 6000 sanding grit.
Note: It is appropriate to mix different batches of the same color in order to ensure color uniformity during application.
Step 5 (Protective Coat – Microvetro Bi) Optional Step
- Mix Microvetro (part A) and Catalyst (part B).
- After adding Catalyst (part B), please use it within 4-5 hours.
- Dilute Microvetro with 20% water for the first coat and 10% water for the second coat.
- Microvetro has 3 types of glossiness: Opaca (Matte), Lucido (glossy) and 30 Gloss (Satin), each with different part B ration.
- Apply first coat using Roller.
- Wait for 4-6 hours to apply second coat.
Note: This extra protection step is recommended for bathroom or tabletop.
*Additional Information:
- The product can be colored with L’ANGELO 4OX color system.
- Super P3D or Stucco P3D is required for tiled walls or raw cement walls as the foundation.
- For a perfect hold of the product on slippery surfaces, roughen the surface with specific paper or grinder.
Showroom HQ
A-G-06, Emerald Avenue,
Jalan PS 11, Prima Selayang,
68100 Selangor.
Call: +6012-727 1962
SUBSCRIBE
Latest designs and offers right at your mail box